Wednesday 17 June 2020

Day 41 - Spider-man scene - leg movements


What I  did today:
Today I worked on the leg movements of the animation. The main difficulty with this part was making sure the motion of the legs followed the momentum and physics of the scene. I also changed some of the hip movements to match the movements of the legs I certain points in the animation.
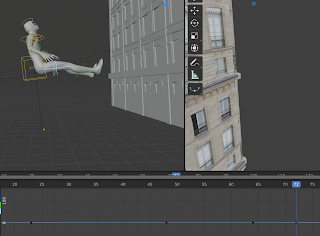
I started with the initial momentum movement the legs would be in as the scene starts and he is swinging around the building.
Then as he is swinging around the building I had the legs straighten out a bit with his waist.

For his backflip/side rotation that he does when falling downwards, I had him tuck in his legs while turning, just as I imagine it would be like in real life. Then as his rotation straightens out he would straighten out to prepare his body for changing rotation when he swings the web to balance out his rotation.

When he is changing his rotation with the web and is pulling himself his legs would just be following the force of the motion and would be slightly behind him before he starts to move them in front to add more momentum when swinging.
While swing he would move his legs forwards while going up just like you would on a playground swing to add momentum.
Then just as before he would do a backflip while following the momentum of the swing and would tuck his legs in to keep them in control while flipping.
 
And then as he straightens out to look where he is swinging his legs would be pushed a little behind him due to the force of his movement.
And then as he swings around the final building his legs would kick forward to help the momentum of the swing.

What I learned today:
Today I learned how to keep in mind that somebody parts in motion lag behind the rest of the body, like how Spider-mans legs are a bit behind when swinging or falling because they are not a core body part and require more force from the person to move them forward when pushing against the motion that the rest of the body is doing.

What I'm doing tomorrow:
Tomorrow I'll work on animating the arms for when they are swinging.

Tuesday 26 May 2020

Day 40 - Spider-man scene - head movements

What I did today:
Today I worked on moving the head around and deciding what and when the model would look at while swinging.


For the start I had him looking towards the building he is holding onto. When moving the head I realized that I couldn't just rotate the head to look where I wanted it but also had to move the head as well by pressing 'G' because if I just rotated it then the neck doesn't follow and it moves in a way that's not physically possible. So after doing this instead of making a keyframe on just the rotation, I made one for the rotation and location.
Next as he's swinging around the building I had it so that he's still looking at where he swung from because the momentum from the swing is turning and flipping him so he would still be looking behind him as he's releasing from the web.

As he is falling down I had him looking straight towards the street and then slowly starting to look a bit higher up towards where he's going to swing to next. The thing with the movements of the head is to make sure it is physically possible in real life so it is tough to make sure how far to move the head back.

Then as he moves he first looks to the right and then left, he would be looking at the buildings so that he isn't swinging wildly and doesn't miss the web.

For the next part of the head movements, I had the head snap down and then back up from the force and momentum of swinging and attaching a new web and changing speed/directions. 
Then as he's flipping backwards I had him move his head backwards because that's usually how I see Spider-man move his head in whatever media I see him do this movement in.
Then after the backflip, I have him look at the building where he's going to swing next.
Then as he swings around the building, I had him keep looking forward to where he is going till the end of the animation.

What I learned today:
Today I learned that when moving certain body parts when animating it is good to remember about how they move in real life and what other body parts move with the part I am trying to animate, like the head and neck for this animation.

What I'm doing tomorrow:
Tomorrow I am going to animate the legs and make adjustments to the hips depending on the momentum of the legs from how I animate them.

Thursday 7 May 2020

Day 39 - Spider-man scene - Chest/upper torso

What I did today:
Today I worked on the upper torso movements. For these. movements I mostly just used my imagination and tried to put myself in the situation to see how the body would move in the situations of the scene.
I first started by rotating the upper torso forward and towards the building because he would be holding onto the web that's connected to the building and would be leaning towards wherever the web is attached.
Next, he would be at the peak of the curve in the path I made and would be just about to release his hold on the web and in the last moments of him holding the web he would be pulled slightly back by the building, which is why I rotated him slightly back and towards the building.
Then I moved him back a bit because in the free fall he would be looking towards the next position to web to, to help keep his momentum going.
Then as he is at the bottom of his swing he would just be about to let go of the web and so that's why I rotated his upper torso back towards the building.
Then as he is going up I rotated his upper torso forward because I plan on him curling up into a ball when he does the flip while going up.
At the top of the swing, I had him facing the building in front. of him a bit because at this point he would just have attached a new web to this building.

And then just as before I had him rotating back towards the building while going around the building because he is still holding onto the web beside him.

What I learned today:
Today I learned the importance of putting myself in the situation of the scene and what I would do and how my body would move in the motion I am making because it helps visualize the scene a lot better.

What I'm doing tomorrow:
Tomorrow I will work on the movement of the head and neck.


Tuesday 5 May 2020

Day 38 - Spider-man scene - waist movements

What I did today:
Today I started animating the actual body itself and I started with the waist. The reason why I started with the waist movements is that it is the center of gravity for the model so I can start by animating from the center and then moving outwards to the other parts of the body.


I first started by selecting the rig of the model and then going to the 'Context Data' tab on the right where the layers for the rig are. I then chose the layers that I wanted for the starting animations where the layers that controlled the large general body parts. The layers are not labeled so I had to figure it out by turning them on and off and seeing which layer controlled which part of the body.
This is what my rig looked like after I chose the layers I wanted. The reason why I hid some layers is so that the rig isn't as cluttered and is easier to work with. I did not know about this before so it was a nice feature to learn about.
I started by rotating the hips forward at the start of the scene due to the motion he would be in when swinging with his legs in front of him as he is moving forward and up to give himself more inertia to go higher. I also split my screen with one side having a pre-render look and the overlays turned off. I did this to show me what it would most likely look rendered.
When I was rotating the waist  I needed it to go forward and not have any side motions so to do this I rotated the waist along the x-axis but normally to do this I would press 'R+X' but what this does is rotate what I've selected along the world x-axis, but I needed the waist bone to rotate along its own x-axis. To do this I pressed 'R+X+X' and by doing this the x-axis I've selected to rotate switches from the world x-axis to the individual bone x-axis.
For the next motion, I rotated the waist forward even more because at this point of the animation the model would have the most animation and would be at the near peak of the curve in the path I made
Then for when the model is falling back towards the ground I got rid of the rotation and put it back to its original set position. To do this I pressed 'ALT+R' which reset the rotation to its original point.
Then as he is freefalling straight downwards I arched his back a bit by rotating the waist backward a bit. I did this because at this point he would be getting ready to web the two buildings to his side to keep swinging and would be looking up, and so if he is looking up in this position he would have to arch his back and move his waist in a way that his back would curve so that he could easily lookup.
Then because when he is coming back up he would want to regain his inertia I moved his waist forward again.
And then I arched him back again because at the start of his backflip he would just let the motion carry his movements and wouldn't do much except move his legs back which would naturally arch his back.
And then for the last keyframe, I moved the waist forward again because of the motion around the corner of the building.

What I learned:
Today I learned about the layers of the rig in the context data tab. Learning about this is really helpful for future projects because it can help me pay attention to what part of the rig I'm working with and lessens the clutter of most rigs.

What I'm doing tomorrow:
Tomorrow I'm going to work on animating the chest and which way the model is leaning in different parts of the animation.

Monday 4 May 2020

Day 37 - Spider-man scene - Basic body motions

What I did today:
Today I worked on the basic motions the entire body would make when moving along the path I made for it. The way I determined which way the model would move is by thinking and imagining how Spider-man would actually move around the buildings and what movements he would do while staying in a constant flow.
I first started at frame 0 where he would start and had the model start off tilted slightly as if it was swinging beside it, about to turn the corner of it. When I made the keyframes I pressed 'I' and then chose only rotation because I wasn't changing the destination or scale of the model and was only changing the rotation of the model so that was the only thing that needed to have a keyframe.
When I originally made the keyframes they where normal keyframes that had the graph editor have curves, which would change the timing of the movements but I needed to change that because in this animation the model needs to keep moving the same speed throughout the scene. So to do this I pressed 'T' which lets me change the interpolation of the graph and then chose the graph to be linear.
Then as the model was moving around the building I rotated the model even more to the side as it would if it was really swinging quickly around the building.

Then as the model was moving downwards in the path I made a keyframe and rotated in a way that the model was getting ready to steady out at the bottom and go straight upwards again.
Then at the bottom of the curve, I had it upright again so that the model could grab onto the two buildings to its side and swing up high again for the later part of the path. Also having it down low like this lets me add a car model or something like that to make the scene more dynamic and have the model pass beside the car.
Then as it was moving upwards again I turned the model upside down again because in real life if the model swung upwards again between the two buildings then the motion will most likely flip him backwards so for this part I will just have the model do a backflip.
Then at the top of the rotation, I made the model upright again and turned it just a bit towards the building to its right so that it can attach to that and swing around it.
And then just like the first corner, the model moved around I rotated the model heavily again as it would if it really swung quickly around a building.

What I learned today:
Today I learned to make these general motions instead of making doing every small part of the model at a time because by making these small motions it acts as a storyboard and I get an idea of what the scene will look like as I keep working on it.

What I'm doing tomorrow:
Tomorrow I'm going to start animating the actual body of the model and will start with the waist of the model.

Why I didn't post:
I didn't post for a while because my computer stopped working and it took a few days to get it fixed by my uncle but now that it is fixed I will go back on my normal schedule of posting everyday.


Wednesday 29 April 2020

Day 36 - Spider-man Scene - Making a path to follow

What I did today:
Today I worked on adding a path that the Spider-man model will follow in the scene and having the model snap to the path.
To start adding in the path I first pressed 'SHIFT+A' and added in a Bezier curve into my scene.
I then scaled up the curve and rotated it to follow the path I wanted.
Once rotating it straight so that it follows the downward path of the street I then went into Edit mode by pressing TAB and by selecting the individual points of the curve I rotated it and moved those individual points to create different levels of height to the curve that the model will follow.
Once I got the end of the curve which is the point selected in the screenshot and had made all the changes to the curve beforehand, I needed the curve to be longer for the final parts of the animation, and so to do this I selected the end part of the curve and then pressed 'E' to extrude the path and make it longer and then rotated and moved the extra point the way I needed it.
I then started on the next portion which is to have the model be connected to the path so that when I animate it, it follows the path. I first started by importing in my model with its rig.

I then went into pose mode for the rig and selected the main hip control which is also the center of the model. I then pressed 'SHIFT+S' to open the cursor wheel which moves the 3D cursor to a location. I then chose the 'move cursor to selected' option.

I then went back into Object Mode and pressed "SHIFT+A' and went to the 'empty' options and brought in a Plain Axis. By moving the 3D cursor to the center of the model before it made it so when I brought in the Plain axis it came in at the center of the model. The reason why I need the Plain axis is that in Blender there is a problem where when moving the character through a path, the character becomes buggy and the rotation keyframes become augmented, and so to fix this adding in a Plain axis is beneficial because I can connect it to the model and add in the large body rotations to that which fixes the problem and so that none of the other animations I make to the body are affected.
To connect the Plain axis to the model I just select the Plain axis and rig and then press'CTRL+P' and select the option with 'keep transform'. Doing this connects the two and makes it so that any rotation or movement I make to the Plain axis will move the overall body with it.

I then selected the Plain axis, which I labeled 'Spider-man Empty', and then went to the Object Constraints panel on the side and added a new constraint. Because I wanted the empty to follow the path I chose the 'follow path' option when adding the constraint. I then went to the 'Target' setting in the constraint I added and chose the path I had made beforehand which I labeled with 'Spider-man Path'.
After doing this, the model automatically moved to the start of the path where I wanted it.

What I learned today:
Everything I did today was completely new to me because I had made animations of characters before where they moved but never of a character actually changing positions in a scene and going from point A to point B. So following the tutorial I'm using helped me a lot and taught me a lot about it and how I could possibly use it for later animations.

What I'm doing tomorrow:
Tomorrow I will start working on some of the basic rotation animations for the scene such as how Spider-man's body will be rotated when he swings around the building or when he does a backflip how much does he need to be turned upside down. Because I'm doing the just the main rotations I'm mostly only going to be using the Plain axis I made for the very purpose of the main body rotations. I will also be figuring out the length of the animation and setting an end in the frames.